Single-Tree
On this page you will find all the information about the features of the Single-Tree approach to language switching. If you don't know yet what is the difference between Single-Tree and Multi-Tree, you can read it on our page about Multilingualism.
To learn the basics of the single-tree process, we recommend our training courses. There you will be shown every step in translating the pages. In addition, individual questions can be answered. This page cannot do that here. Instead, it serves as a small reference guide explaining the most important parts of the single-tree approach.
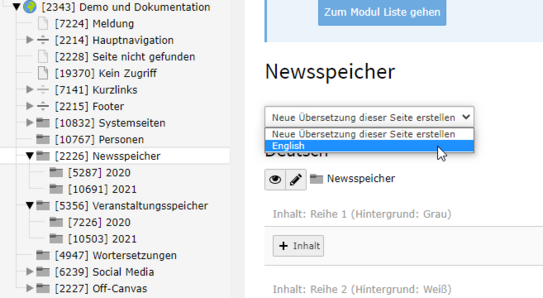
In order to be able to use the single-tree translation mode, this must be selected when applying for the gig. Whether German or English is the leading language is irrelevant, but in the following example German is always the default language and English the target language. In your set up single tree appearance you can create a new translation on each page (see screenshot "New translation").
Please translate the start page first, otherwise all other pages cannot be displayed in the translated form.
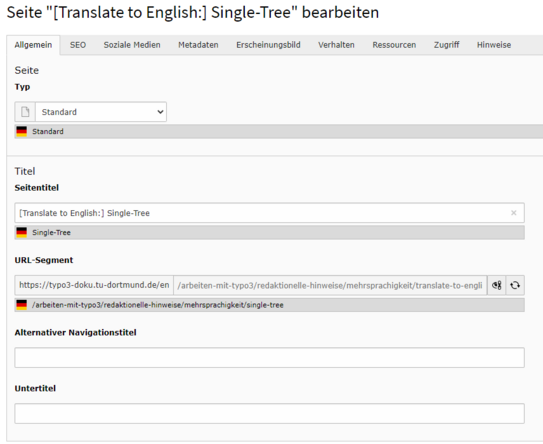
Then you will be taken to the page properties of the newly created English page. There you will find the German page title with the addition "[Translate to English:]". You should translate this and then regenerate the URL (see screenshot "Page properties"). The texts with a gray background and the Germany flag point to the original page title or the original URL. This allows you to match your translation without leaving the page properties.
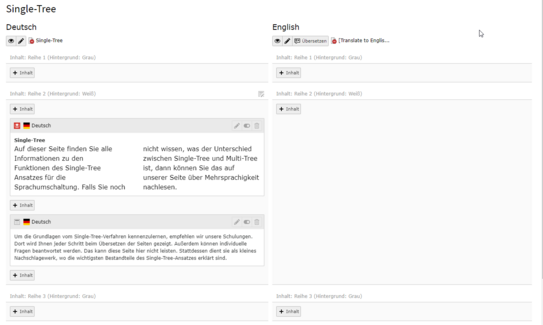
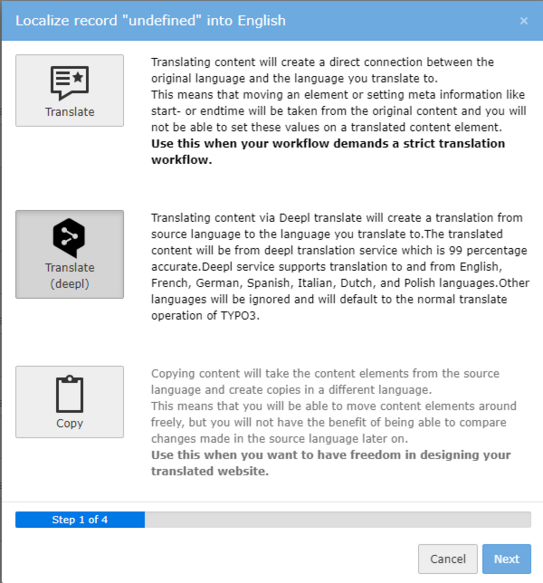
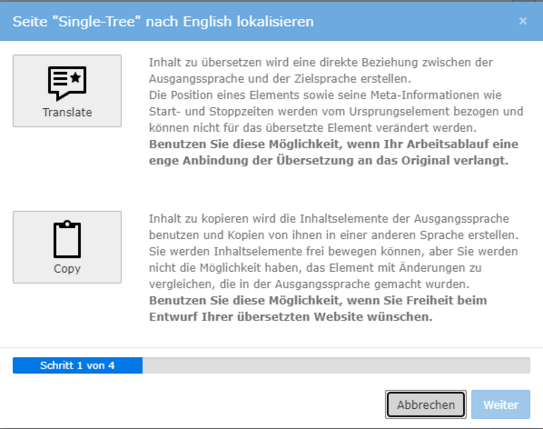
After the page properties are adjusted, the page is now permanently in a two-column view (see screenshot "Two-column view"). On the left side is the German page, on the right side the English page, which now needs to be filled with content. By clicking the "Translate" button you will get to the menu shown in the screenshot "Selection menu". There you can choose between the "Translate" and "Copy" options, which are explained below.
Connected vs. Free mode
The following notes apply to normal pages. News, forms and other special features are explained below.
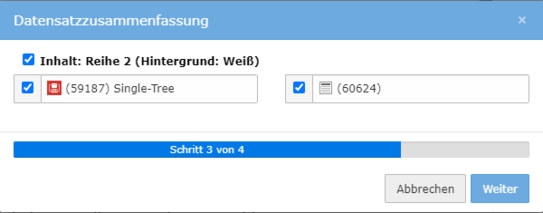
In both modes, after selection, you will be prompted to select the content elements to be translated (see "Select elements" screenshot).
Connected mode - Translate
If you have selected "Translate" in the drop-down menu, the resulting translation will be created in the so-called connected mode. This means that the elements cannot be changed in their order. Also, you will not be able to add additional elements. You end up creating a 1:1 copy of the original page, which differs from your new page only by the translation and any omitted elements.
So choose the linked mode if you want to create a translation that is as close to the original as possible, without making any major changes.
Connected mode is also a prerequisite for using automatic translation with DeepL. You can find more information about DeepL on our topic page.
Free mode - Copy
The Free Mode results from the selection of "Copy" in the selection menu. As the name suggests, with this mode you are not bound to the structure of the original. In the Free Mode, the content elements can be moved, deleted and also new elements can be added. Thus, the Free mode allows you to adapt the original more freely than the Connected mode.
By deleting all content elements of the translated page, you reset the mode. Then you can use the drop-down menu to select the mode again and change it accordingly.
Special features
News and events
News and events can also be translated. However, since these are not pages but records, the procedure is different from what has already been described. First of all, it is important that the storage is translated. By this is meant that the location where news and events are stored must also be translated.
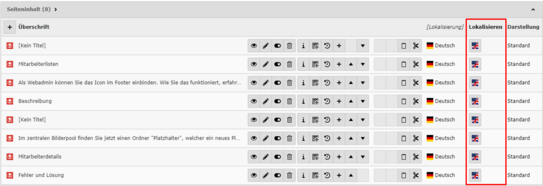
As you can see in the screenshot "News and Events Store", you create a new translation for the News or Events Store folder for this purpose (names may differ). After you have changed the page title and adjusted the URL so that it no longer says "Translate to English:" in front of it, you can save the newly translated page. It is important that the subfolders of the stores also get a translation in the same procedure. Only then the buttons for localization of news and events will be displayed (see screenshot "New localization").
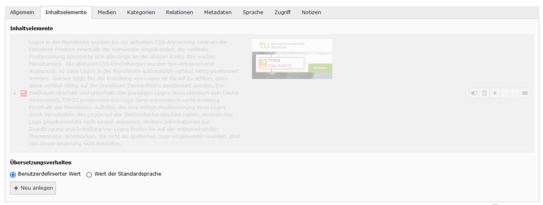
By using the button you create a translation for the news or event. This way, when you switch to the English language mode, this version of the page will be displayed. If the news contains content elements, translations will be created for them as well, but they will be hidden at first. It is important to activate these already existing elements and fill them with the English content. Under no circumstances should new content elements be created in the English news. These would no longer have a connection to the German version and would lead to error messages in the backend. In addition, "Custom value" should be selected for the translation behavior.
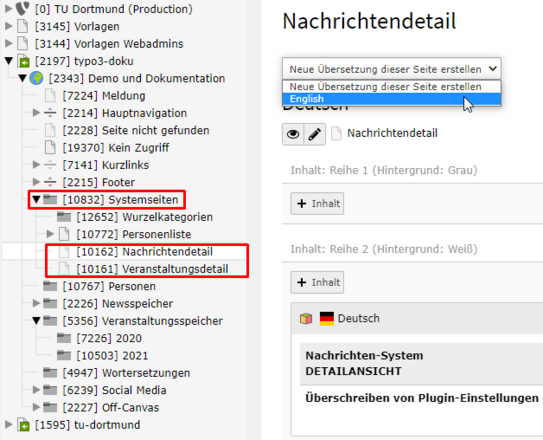
To ensure that the pages are then displayed correctly, you still need to translate the detail pages. To do this, navigate to the "System pages" folder and create a new translation for the "News detail" and "Event detail" pages (see screenshot "Translate detail pages"). After creating the translations, news and events can now be displayed in English.
Forms
Forms cannot be translated directly. Instead, a new form must be created. In this new form you can then create a translated, identical version of the original. This must be done manually. So you build a completely new form, but in a different language. So if you want to translate a page with a form, then in the translated page you have to change the embedded form to the English version.
Off-Canvas
The texts in the off-canvas menu have to be translated manually. How this works is described on the page about appearance management and multilingualism. Mainly it is about the texts in the directions. You can take these over from the main appearance of the TU Dortmund.
Use templates
When including templates, e.g. for accessibility, imprint, etc., you should make sure that you include or copy the English versions. You can find more detailed information about the templates on our page about the meta menu. In the screenshot "English templates" you can see where to find these templates.
Translation of the "Page not found" and "No access" pages
For your single tree appearance, please translate the 404 and 403 error pages as well. To do this, navigate to the respective pages, create a new translation and insert the respective English content. The following suggestions are translations of the standard German text, which you can, but do not have to, adopt.
For the 404 page (Page not found), the English text is as follows:
"Unfortunately, the requested URL is not available. You can use the search function or navigate to the sections of the website using the navigation at the top of the page.
If you have any suggestions for improvement or would like to report an error, please contact us using the suggestion form at the bottom of the page."
For the 403 page (No Access), the English text is as follows:
"You have tried to open a page you don't have access to. If you have any questions, please use the Suggestions? form or send an email to the address mentioned at the bottom of the page."
Menu separator
Pages of the type "Separator for menu" cannot and must not be translated, because they are not relevant for the display in the frontend.
Moving content elements in Connected mode
When you have translated a page in connected mode (Translate), the content elements of the leading language and their translations form connected pairs. If the content elements are subsequently moved in the page view of a page, the associated partners are also positioned in the new location.
It is important to keep in mind:
Each page, depending on the selected backend layout, is divided into different rows, which are called "content areas" in the following. Each content area is displayed in the frontend with a different background color (gray or white) and can contain either no, one or more content elements. Accordingly, content areas are used to group the content of a page visually. For more information on backend layouts, see our topic page.
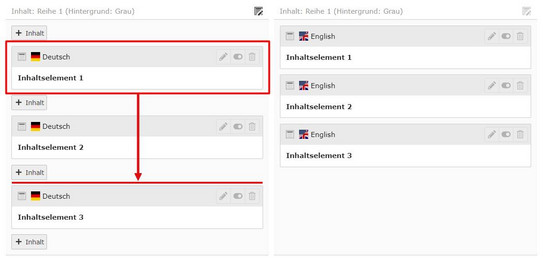
When you move a content element within a content area, the translation is also moved to the correct position, but this change is not directly displayed. To do this, you need to reopen the page once in the page view after moving it. After that you will also see the translation of the moved content element at the correct position (see screenshot "Move content element within a content area").
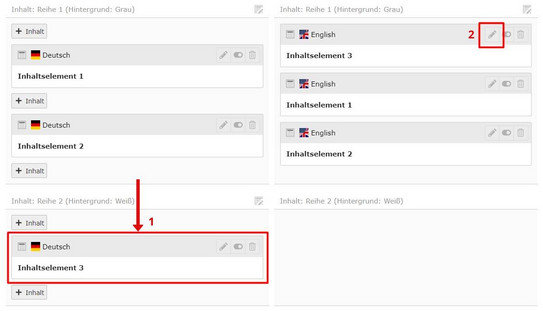
If you move a content element to another content area, the translation will not be moved automatically. Instead, the translation will be moved to the top position within the old content area (see screenshot "Move content item to another content area"). You will then need to manually move the translation to the new content area. To do this, edit the translation of the content element and select the appropriate content area there in the "Content area" tab (see screenshot "Manually assign translated content element to new content area").
Images
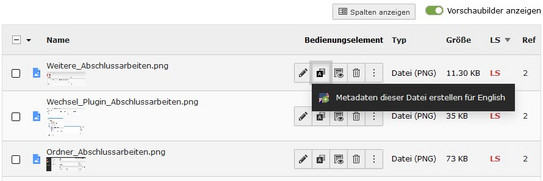
Translating images is necessary so that the titles and alt texts also match the displayed language. To do this, click on the globe icon next to an image in the file list (see screenshot "Translate images"). Then you will see the British flag, which you can click on to create the English translation. This will not differ from the original image properties in terms of options. Please note our notes on copyright and alternative texts.

